Tuesday 13 April 2010

[FOTD] MAC Stacked #1! Look #1


I've recently fell again for MAC and its collections, the Spring Forecast being no exception, and neither my fascination with pigments. Hence this look, based on the Stacked 1! pigments from the Spring Forecast 1 collection by MAC, the pinkish one.

With all this Pink extravaganza at my disposal, I ended up playing around making this very night-like (I dare you go out in the sun in it) look, with cat-like eyes and the triumph of glitters that these pigments leave around.

(click on the picture to see the much bigger version)


Ok, this is actually easier than you can possibly guess.
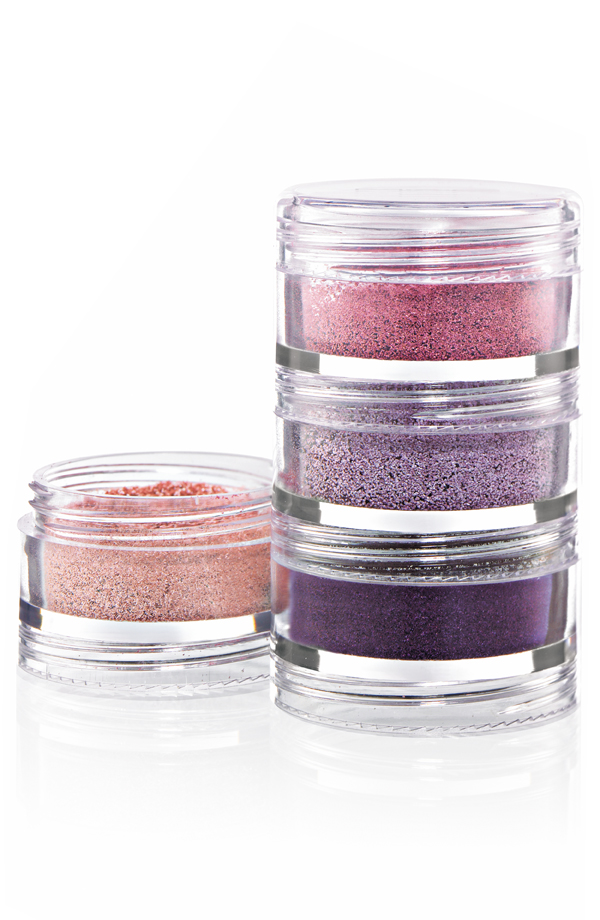
I used only 2 of the 4 colours in the MAC Stacked 1! set, the Lilac and Dark Purple.
I started with a black creamy base provided by a MAC Shadestick in Sharkskin all over the eyelid, on which I packed the Purple first in the outer half of the eye with an angled brush (so that I could achieve the cat-like-ness). And I packed and packed and packed colour until it looked like this, which honestly, did not take much, they are just SO pigmented! I literally just had to take some powder from the cap lid of the case, and that was enough!
I then started with the Lilac on the inner corner, put in place by tapping with a MAC #239. Same goes as for the purple, minimal quantities needed.
Cherry on top, was taking a blending brush (like a MAC #217) and blend the colours in the crease so that it could look softer and... ta-daa! done!

I love love love these colours... don't you?

Sunday 21 March 2010

[LOOK] Pin-Up Eyeliner and Blue-Teal-Green


A month or so ago I became obsessive about Japanese eyeshadow palettes, cause it turned out, what I though of as groundbreaking, when Dior launched its 5 Couleurs Designer palettes, was actually what Japanese eyeshadow palettes had always ben about.
Both the Dior Designer Colour palettes and most Majolica Majorca, Kanebo and such Japanese drugstore brands do work in fact on monochromes shades of the same base colour, which in the colourful mess I found myself into sometimes here in the old continent , were some sort of fresh breath of air. And as in that same old continend we weren't blessed with the Green Design version of said Dior 5 Couleurs Designer palette 408, which is an Asia-only exclusive, I started to be on the lookout for substitutes. One of the best options I ran into was the Kanebo Kate Diamond Cut Eyes in GN-1, which is basically a monochrome around aqua-greens


(Dior 5 Couleurs Designer 408 Green Design)


(Kanebo Kate Diamond Cut Eyes GN-1)

After getting my hands on the Kate Diamond Cut palette, I tried my hand at a very simple look, which was actually based around a cat-like/pin-up eyeliner. I wanted something dark to soften the difference between the liner and the lid, but instead of a simple black for smokey, I went for the dark teal/bluish-green which is the shadow colour of the Kate Diamond Cut GN-1 palette (the one on the bottom right). Along the same lines, instead of a white highlight point at the tear dot I went for the light green hue of the same palette (the one on the bottom left), and basically, these were the main thing that brought me to this look.

(click on the picture to see the much bigger version)


Ok now, onto the boring bit of how I achieved this...


  • Urban Decay Primer Potion all over the lid and just below the brows
  • Kate Diamond Cut GN-1 white colour base (top-right) all over the eyelid with a large blending brush (I used a Dior Backstage Make-up "Eyeshadow Brush-Large")
  • Kate Diamond Cut GN-1 dark shadow colour (bottom right) over the external 2/3 of the upper lash line and 1/3 of the bottom lash line, tapped with a small short-haired brush (I used Sephora Professionnel #14) and the smudged with a pencil brush (I used Mac #219 then Mac #217)
  • Kate Diamond Cut GN-1 green colour (bottom left) on he inner corner just outside the tear dot blended with a pencil brush (I used MAC #219 again)
  • Kate Diamond Cut GN-1 silver highlight (right half of the round highlighter at the top-left) over the green in the inner corner with a pencil brush (still MAC #219) and under the brow with a large blending brush (again a Dior Backstage Make-up "Eyeshadow Brush-Large")
  • MAC Fluidline in Blacktrack drawn with a small angled brush (I used a MAC #266 brush). I usually start from the outside and come to cover the external 2/3 of the upper lash line, making it thicker on the outer side.


and that's it, done :)

Saturday 6 March 2010

[REVIEW] Barry M Nail Paint

Ok, so, first review, actually not on something I am usually that much of an expert on but I will tell you what I experienced. To make a long story short? Barry M? not so good on nail lacquers, actually, not good at all.

They retail for £2.95 each, I bought 3 different sparkling shades, all incredible disappointments. Even with 3 coats, the result was horrible, so much so they cannot be worn together, but probably only as a top coat over a previous nail polish (in which case, I'd advice on a matte one, as all these one I am gonna post pictures of, are glittery ones)

here goes the horrible result...

287 Acqua Blue


151 Electric Blue Glitter - I got this believing it could've been some sort of substitute for Chanel's "Ciel de Nuit". How wrong was I...


289 Gold - same as above, I wanted to believe I could get the same effect as the then already sold out Chanel's Gold Facettes


Verdict: so so wrong...